
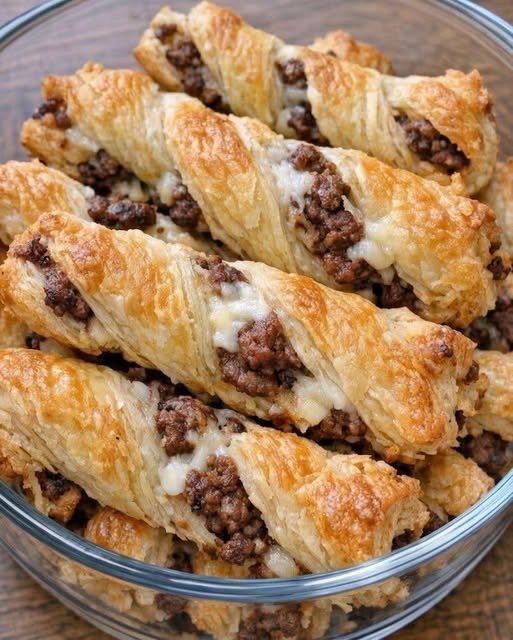
4-Ingredient Beef Puff Pastry 🥐
Crispy, flaky puff pastry filled with juicy beef mince and melted cheese. This easy recipe is perfect for snacks, lunchboxes, or parties.
Prep time: 15 minutes Cook time: 20–25 minutes Makes: 8 pastries
Ingredients
-
Puff pastry: 1 sheet (about 400–500 g), thawed
-
Beef mince: 250 g
-
Grated cheese: 1 cup mozzarella or cheddar
-
Egg: 1, beaten for brushing
Optional: Salt, black pepper, garlic powder, or chilli flakes for extra flavour.
Instructions
Step 1: Cook the beef
-
Heat a pan over medium heat.
-
Add the beef mince and cook for 7–10 minutes, breaking it apart with a spoon.
-
Cook until the beef is thoroughly cooked and any excess liquid has evaporated.
-
Add seasoning if desired.
-
Allow the beef to cool completely.
Step 2: Prepare the pastry
-
Preheat your oven to 200°C (400°F), or 180°C for a fan oven.
-
Place the thawed puff pastry on a lightly floured surface.
-
Cut it into 8 equal squares.
Step 3: Fill the pastry
-
Place a spoonful of cooked beef in the centre of each square.
-
Add grated cheese on top.
-
Fold each square into a triangle or rectangle.
-
Press the edges firmly with a fork to seal.
Step 4: Apply egg wash
-
Arrange the pastries on a baking tray lined with baking paper.
-
Brush the tops with beaten egg to help them turn golden and shiny.
Step 5: Bake
-
Bake for 20–25 minutes, until puffed, crisp, and golden brown.
-
Leave to cool for 5 minutes before serving.
Tips for the best results
-
Keep the pastry cold before baking for maximum flakiness.
-
Always cool the beef before adding it to the pastry.
-
Avoid wet filling, as excess moisture can make the bottom soggy.
-
Seal the edges well to prevent the cheese from leaking out.
Serving suggestions
Serve warm with ketchup, garlic mayonnaise, or chilli sauce.
Storage: Refrigerate cooked pastries in an airtight container for up to 3 days. Reheat in an oven or air fryer at 170–180°C until hot and crispy.
